Your Apple ID is a personal account that you use to access Apple services like iCloud, Find My, App Store, Apple Music, Apple Pay, iMessage, FaceTime, and more. You can add multiple Apple devices to your Apple ID and sync your iCloud data across all your devices. It means your Apple ID can be treated as an all-in-one account for everything Apple. If you’ve ever lost or forgotten your Apple ID password, you can understand how frustrating everything becomes. You can’t access your Apple account or iCloud data or manage your Apple devices. In short, forgetting your Apple ID can mess up your digital life.
If you’ve set up two-factor authentication, Apple just cannot reset the password for you. Additionally, if you’ve opted for the
new Advanced Data Protection feature, you’ve to take up more responsibility to recover your iCloud data. Now that’s because this safety feature uses end-to-end encryption to protect a majority of your iCloud data, and Apple doesn’t have access to the encryption keys. So, Apple won’t be able to recover your data if you ever forget your password. To escape such annoyances and make your life easier, it’s a great idea to set up a recovery contact to recover your Apple ID password and access your account. It ensures that you always have access to your Apple account, no matter if you’ve lost your Apple ID password. A recovery contact can help you verify your identity and you can access your account.
If you’re wondering how to set up account recovery contacts for iCloud, we’ll show you how it’s done. In this article, we’ll walk you
through the step-by-step process of how to set up an Apple recovery contact on your iPhone, iPad, iPod Touch, and Mac. Additionally, we’ll tell you how to get the recovery code to recover your iCloud account and how to accept a recovery contact request on your Apple device. Before you proceed any further, just make sure you’ve installed at least iOS 15 on iPhone & iPod Touch, iPadOS 15 on iPad, and macOS Monterey on Mac.
Disclaimer: It’s not mandatory to set up a recovery account but it can make it much easier to regain access to your Apple account if you ever forget your Apple ID or device’s passcode. In such situations, it’s a nice idea to set one up so you have that peace of mind that you can easily regain access to your iCloud and all of your data.
How to set up an Account Recovery Contact for iCloud
What is a Recovery Contact?
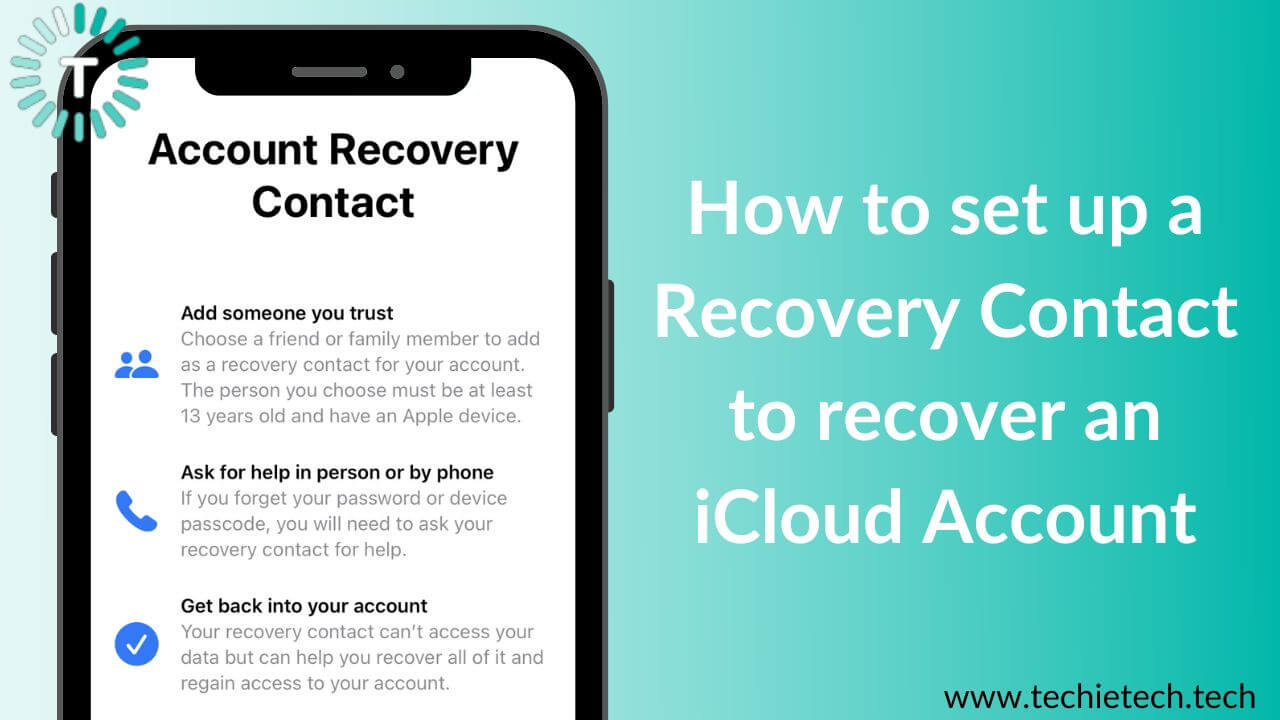
A recovery contact is a trusted friend or a family member who also owns an Apple device. They can help you verify your identity and regain access to your iCloud account and all of the stored data even if you forget your Apple ID password or device’s passcode. Your recovery contact will receive codes so you can recover your account and data. It’s worth knowing that no recovery contact can ever access your account or any data, they only have the ability to receive the six-digit codes to help you with the Apple account recovery process.
Also Read: How to enable End-to-End Encryption for iCloud backup
Can a Recovery Contact access my iCloud account?
No, a recovery contact cannot access your iCloud account. They won’t have access to any of your data stored in the iCloud. A recovery contact only has the ability to give you a code to recover your Apple ID password and gain access to your iCloud account. It’s worth mentioning that you can add up to 5 recovery contacts and remove them whenever you want to.
How to choose a Recovery Contact for your Apple ID Account?
Anyone who’s in your contacts list and has an Apple device can be your recovery contact for the iCloud account. That said, it’s always recommended to choose a person that you know and trust. For example, a close friend or a family member can be your Apple account recovery contact.
Also, since your recovery contact would have to accept the invitation and give you the recovery code whenever you need it, make sure to choose someone whom you’re in touch with and can contact easily. Please note that Apple allows you to select up to five recovery contacts for your iCloud account.
It’s worth mentioning that during the account recovery process, Apple will just mention the codes that have been sent to the recovery contacts and not their respective names. It’s your responsibility that you always remember your recovery contacts.
Moving on, make sure your recovery contact has an iPhone with iOS 15 or later, an iPad with iPadOS 15 or later, or a Mac with macOS Monterey or later.
Also Read: Top 4 methods on how to back up any iPhone
What you should know before setting up a Recovery Contact for an iCloud Account?
There are some prerequisites for setting up a recovery contact for your iCloud account. Let’s have a quick look at them.
- You must be over the age of 13.
- Make sure you’ve turned On two-factor authentication for your Apple ID.
- All of your Apple devices must be running iOS 15, iPadOS 15, macOS Monterey, watchOS 8, or higher versions. You might be asked to update your devices that aren’t running the latest OS.
- If you’ve got an incompatible device that doesn’t support the latest version of the OS, you must remove them from your Apple ID.
Also Read: How to fix an iPhone stuck on preparing update?
How to set up a Recovery Contact for iCloud Account on iPhone or iPad?
Here’s how to set up an Apple recovery contact on iPhone, iPad, or iPod Touch:
Disclaimer: Before you proceed with the below steps, make sure you’ve installed iOS 15 (or newer) on iPhone & iPod Touch and iPadOS 15 (or newer) on iPad.
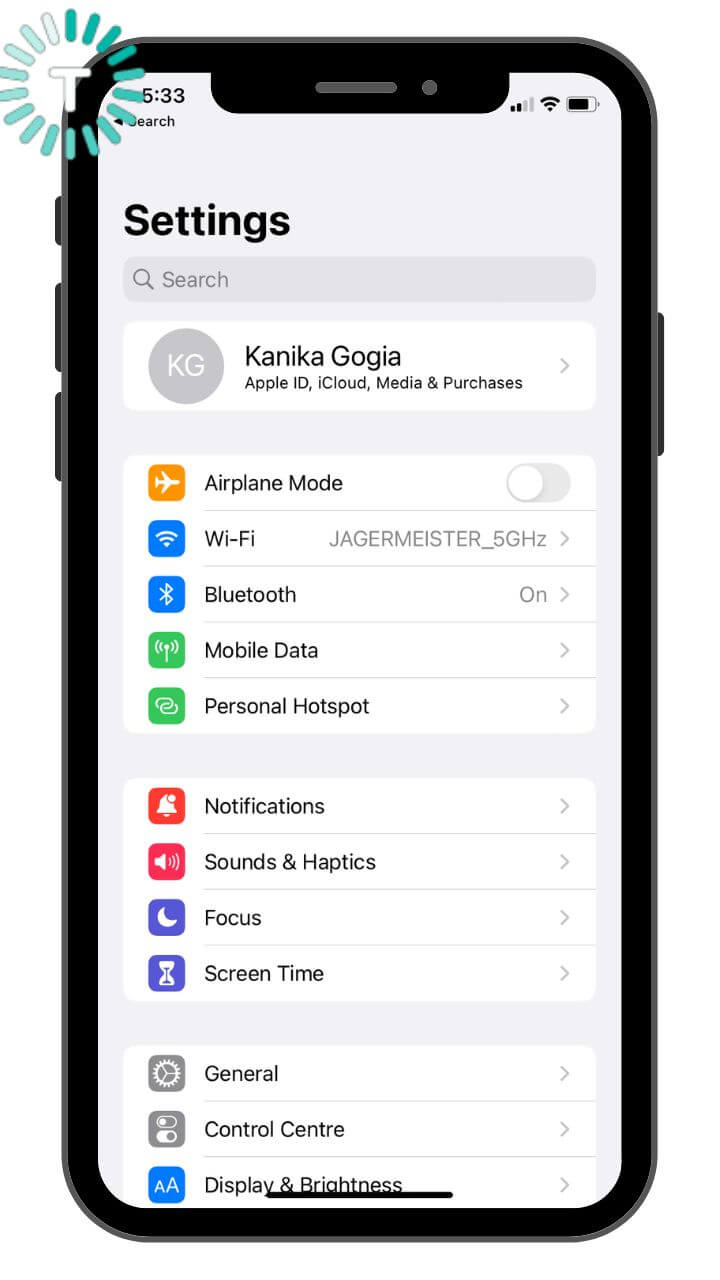
1. On your iPhone or iPad, tap Settings > [Your Name]
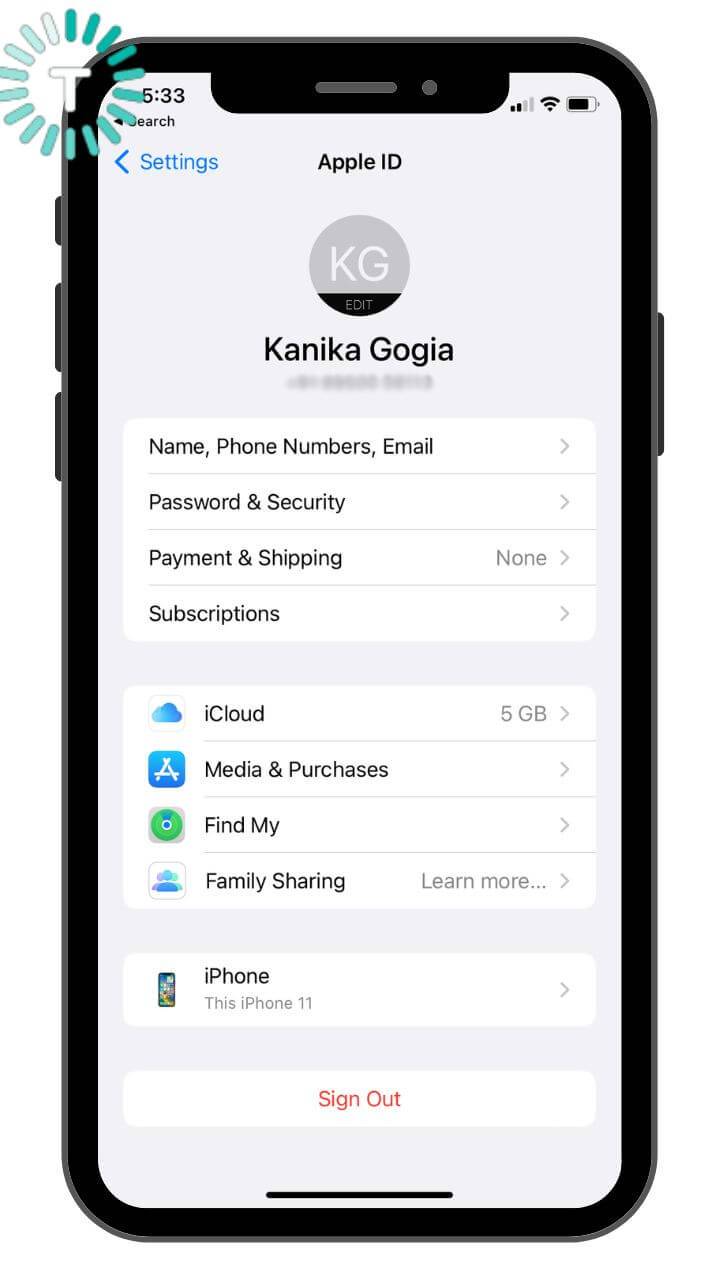
2. Tap Password & Security
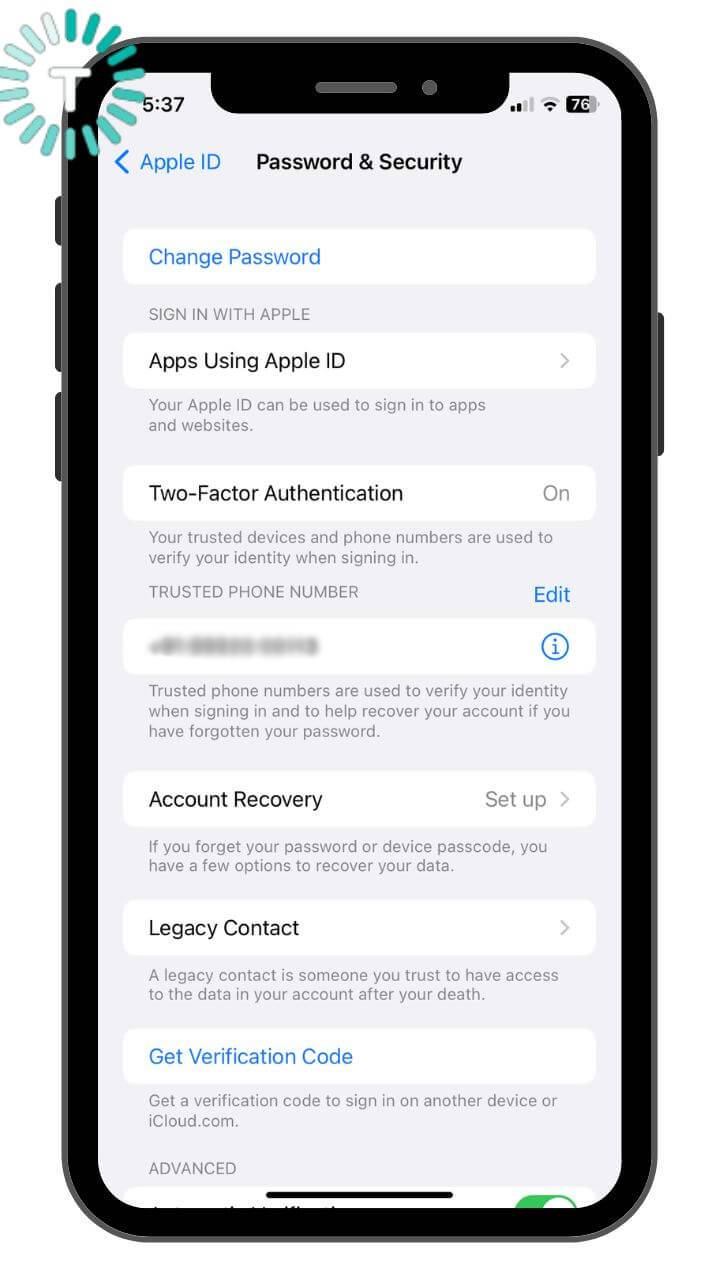
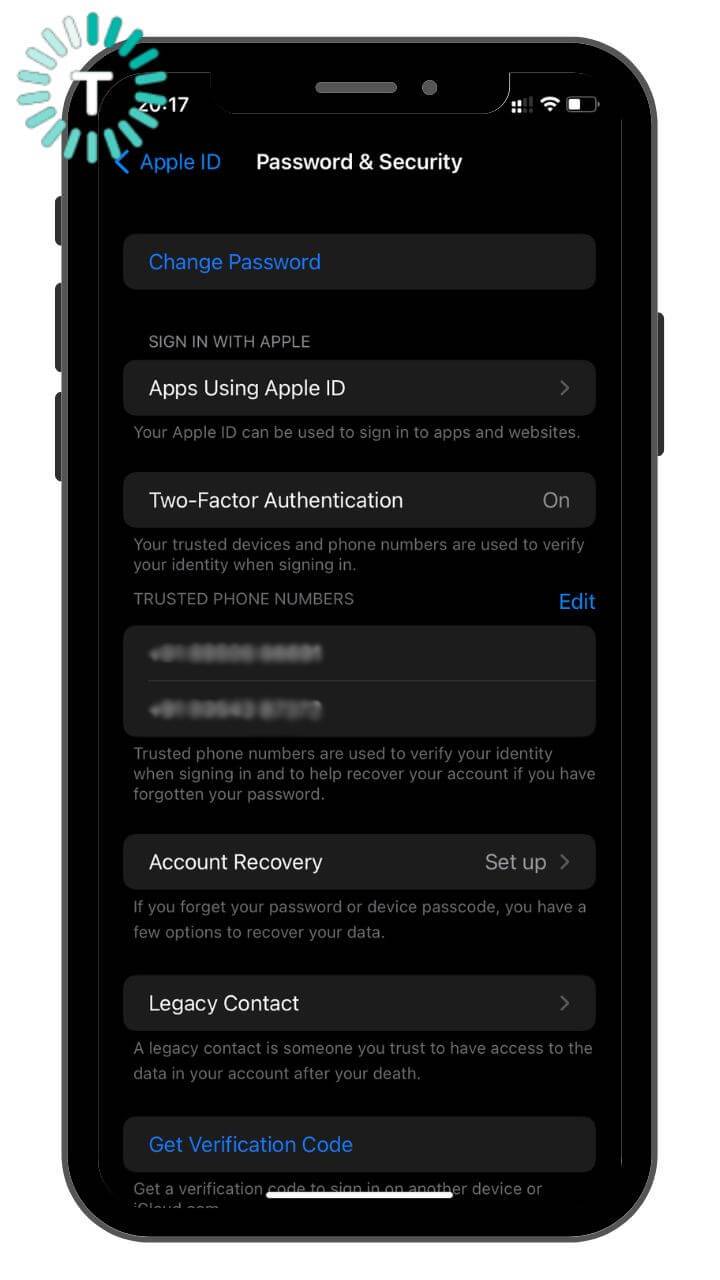
3. Then, tap Account Recovery
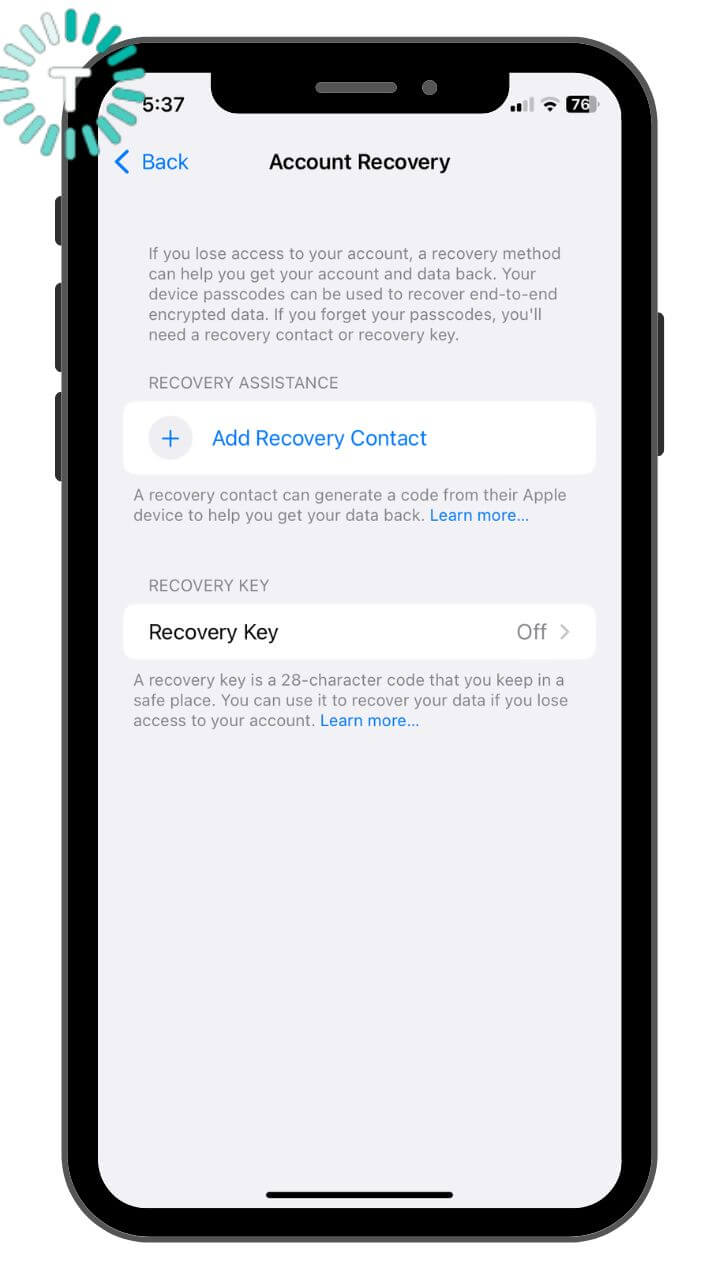
4. Under the Account Recovery section, tap Add Recovery Contact.
5. Tap Account Recovery Contact. You’ll need to authenticate with FaceID or TouchID.
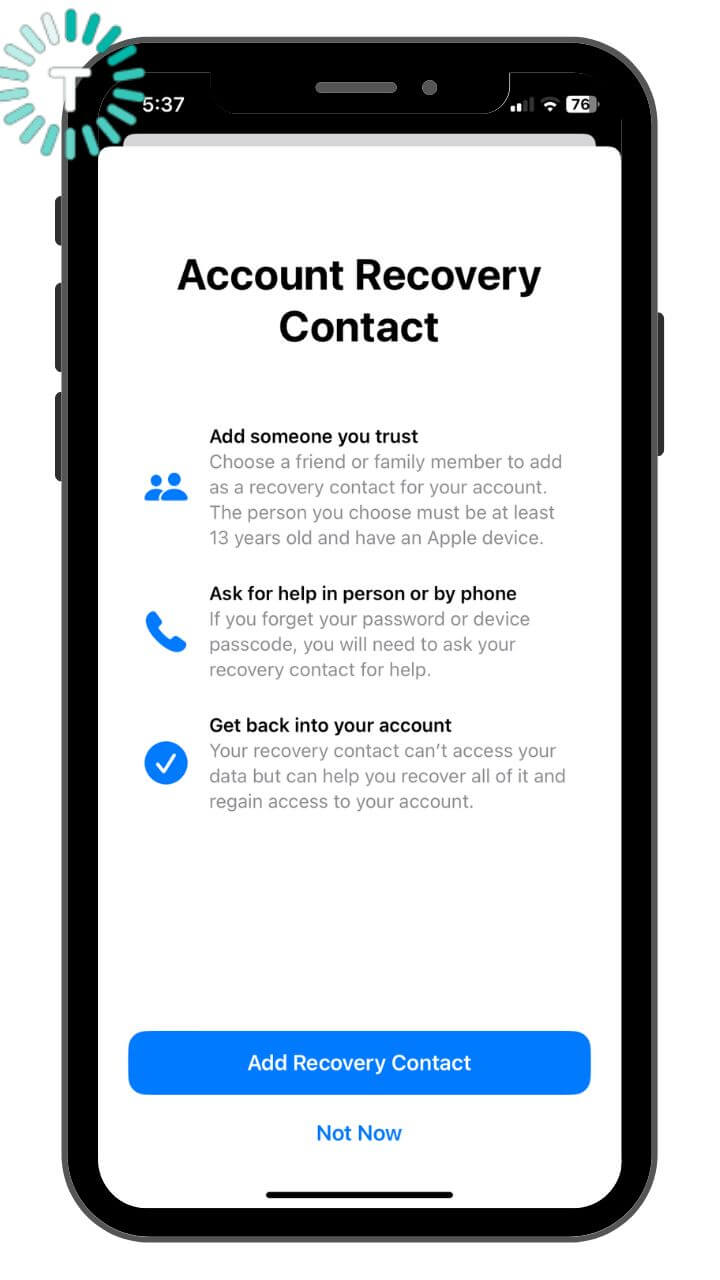
6. If you’re in a Family Sharing group, the members of the group are recommended. Otherwise, you’ll see some suggested contacts. You can choose your recovery contact from this list or
tap on the “+” icon to choose a name from your contacts. Tap Add.
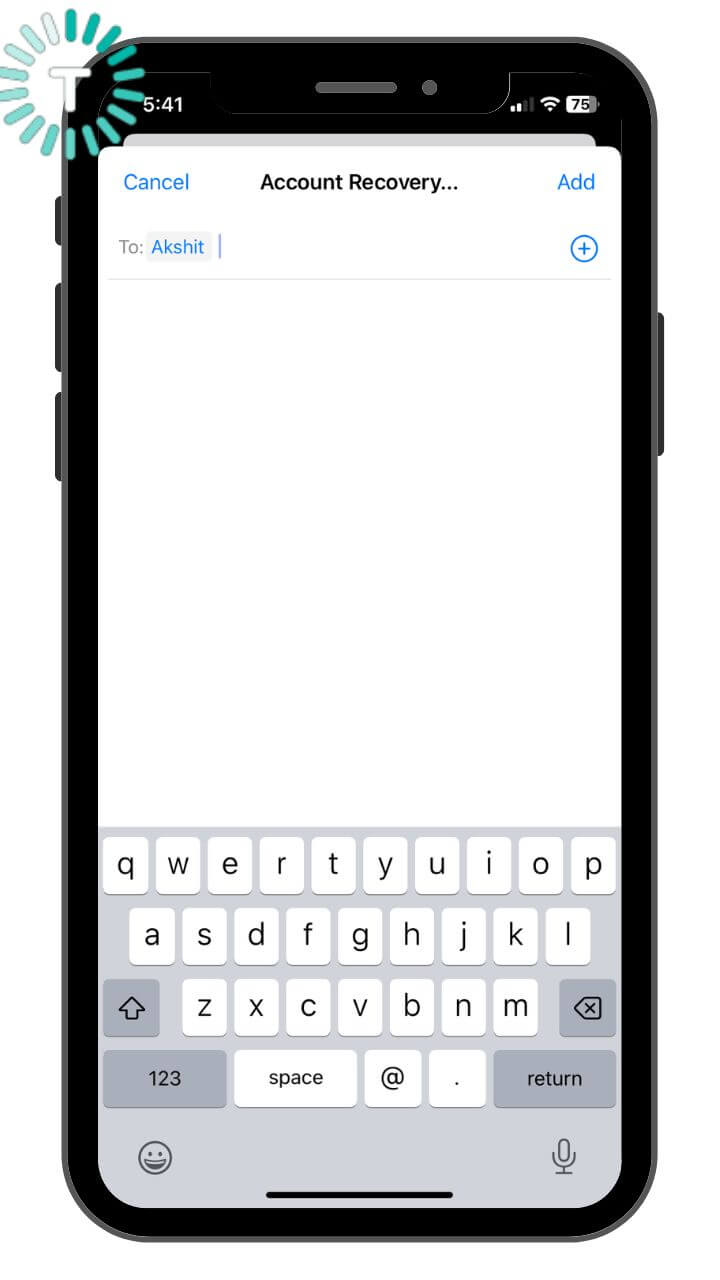
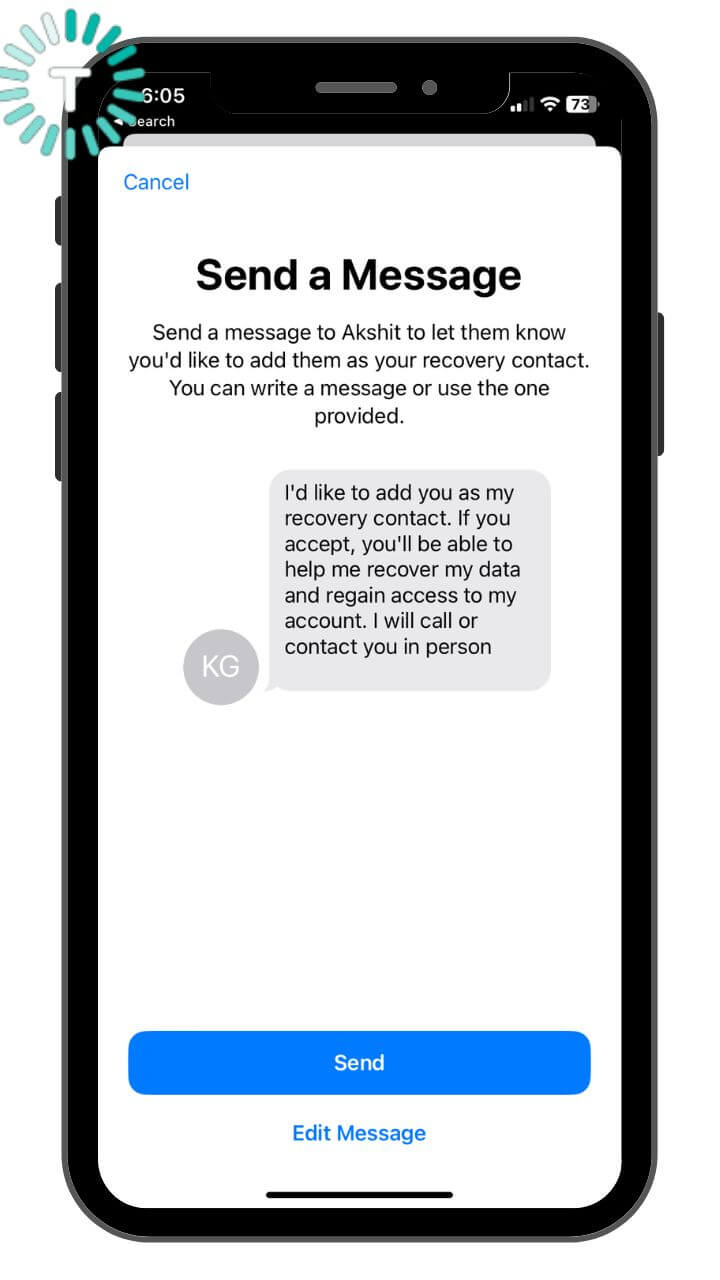
6. You’ll be directed to a Send a Message screen with a pre-typed message. You can also edit the message. Once you’re all set, hit the Send button.
7. You’ll see a confirmation that the message has been sent to your contact. Tap Done.
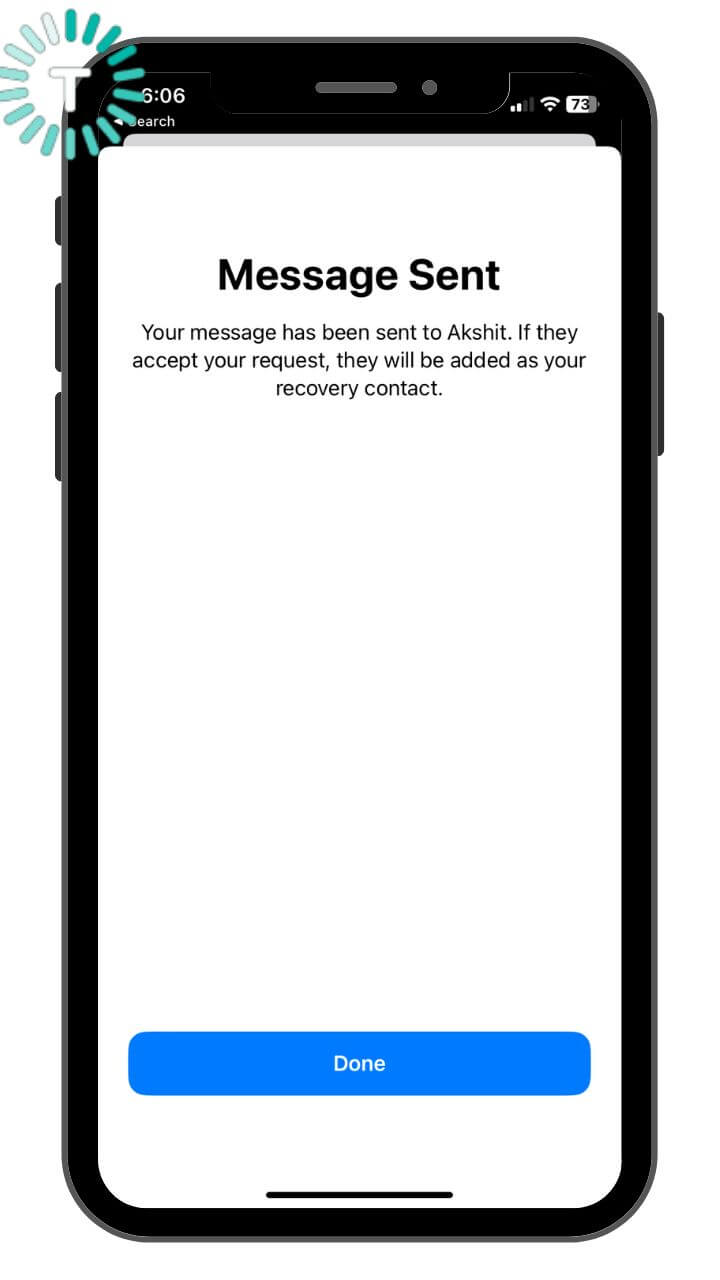
8. If you select a family member, they will be added automatically. On the flip side, if you select a contact, he/she needs to accept the request on their Apple device. You can call or message them as soon as you add them as your recovery contact.
9. Once your contact has accepted the request, you’ll get a message that he/she has been added as the recovery contact.
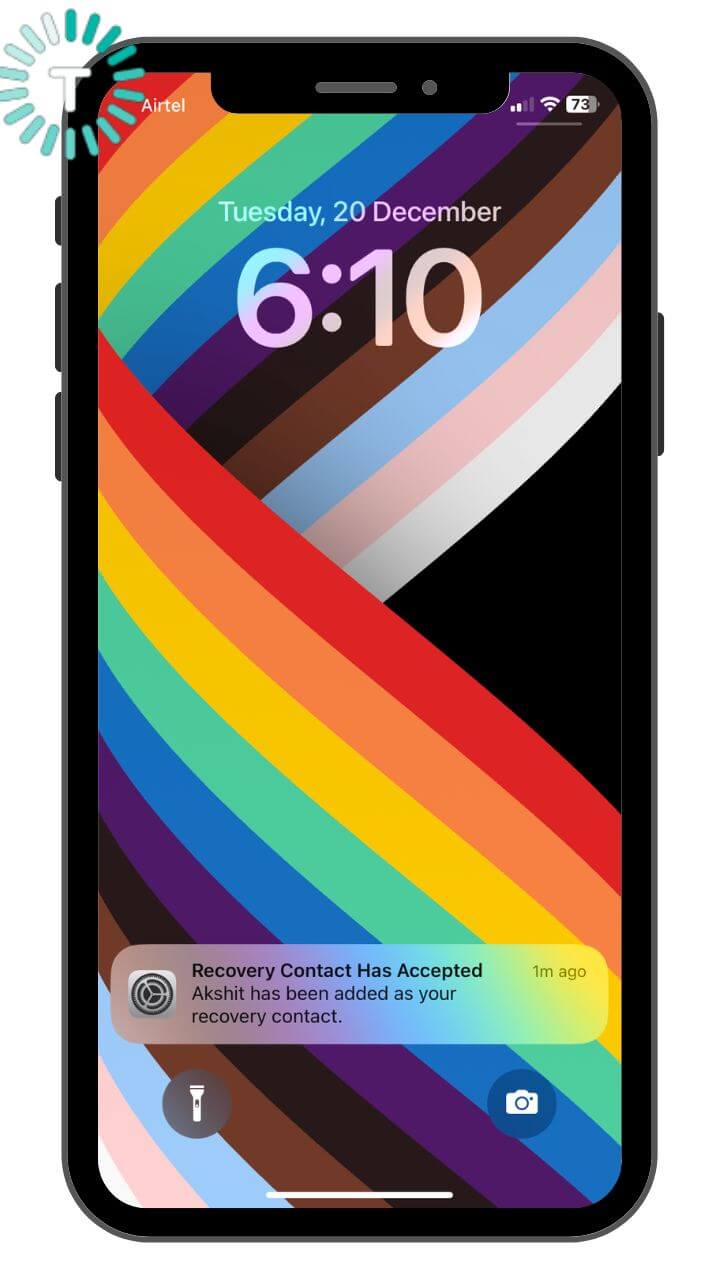
10. When you go to the Account Recovery page, you’ll see the name of your recovery contact under the Recovery Assistance section.
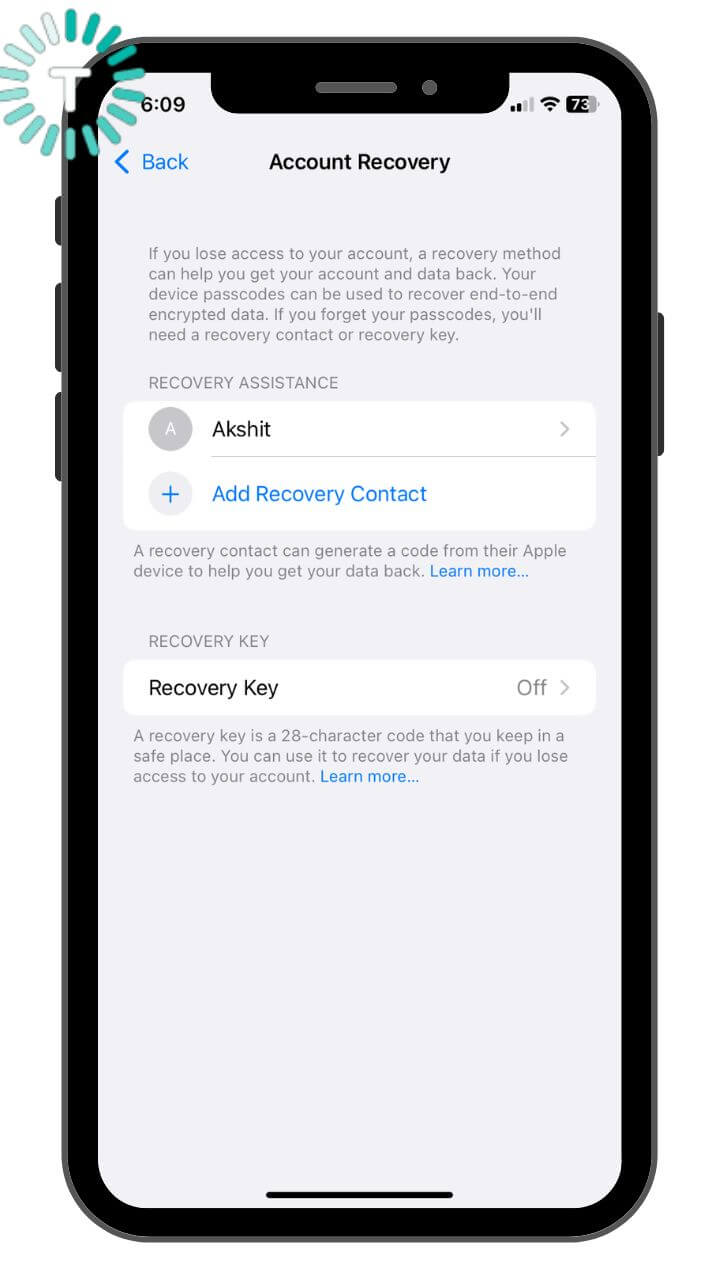
10. To remove a recovery contact, tap his name and select Remove Contact.
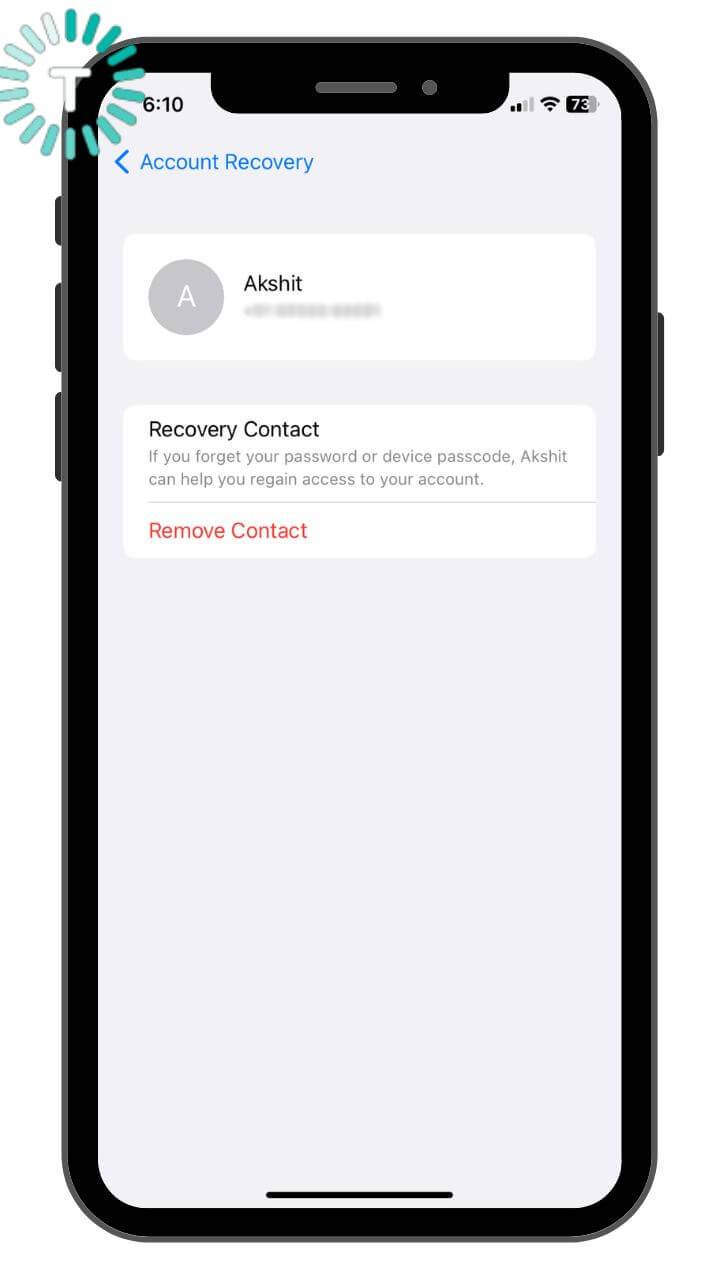
It’s worth knowing that your family member or friend can decline the request or remove themselves as your iCloud account recovery contact. When they do so, you’ll need to set up a new recovery contact for recovering your iCloud account.
Also Read: How to set up Passkeys on iPhone and Mac
How to set up a Recovery Contact for your Apple ID account on Mac?
Here are the steps to set up an Apple recovery contact on your Mac to recover your Apple ID password.
Disclaimer: Before you proceed any further, make sure you’ve installed macOS Monterey or higher.
1. Go to Apple Menu > System Settings (or System Preferences) and click your name.
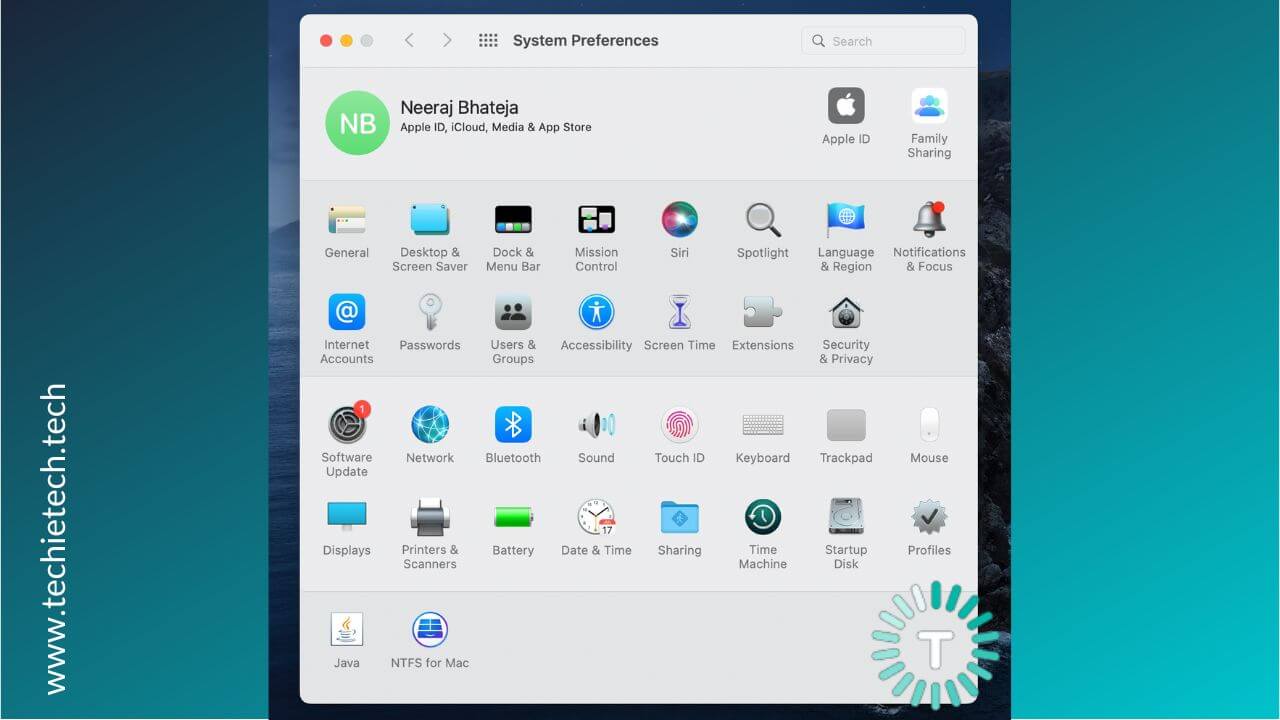
2. Select Password & Security
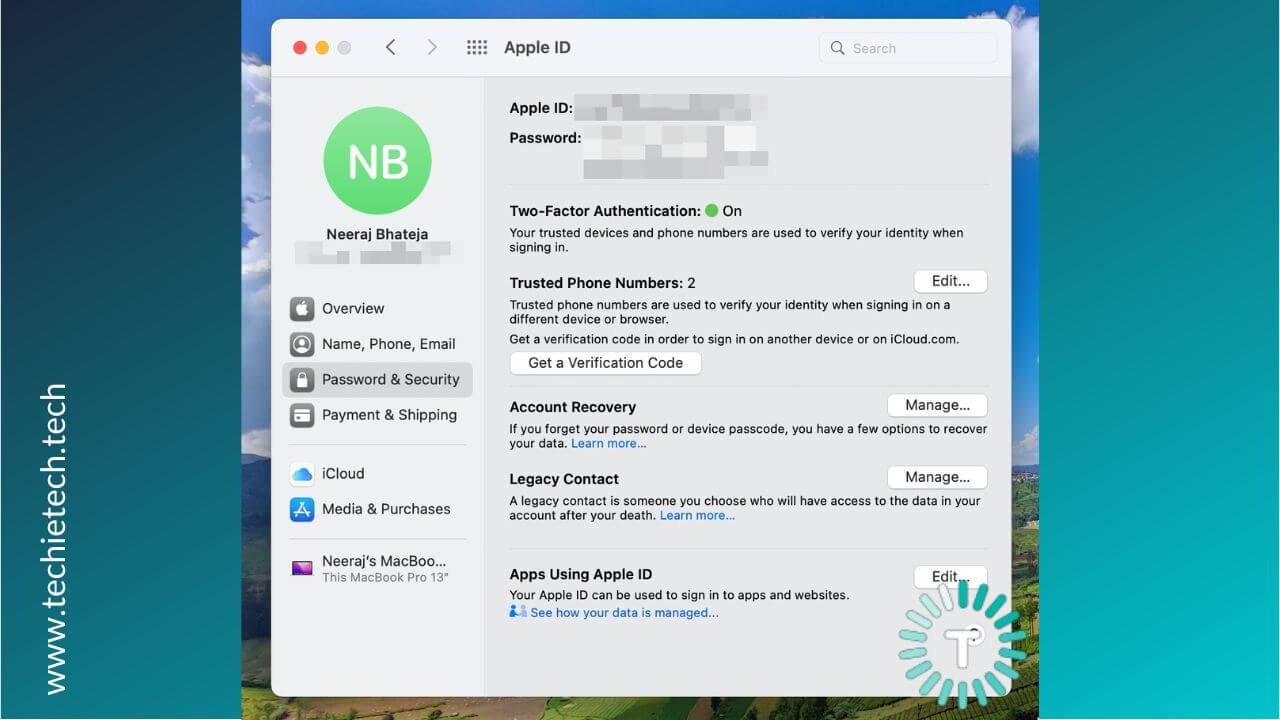
3. Click Manage available next to Account Recovery.
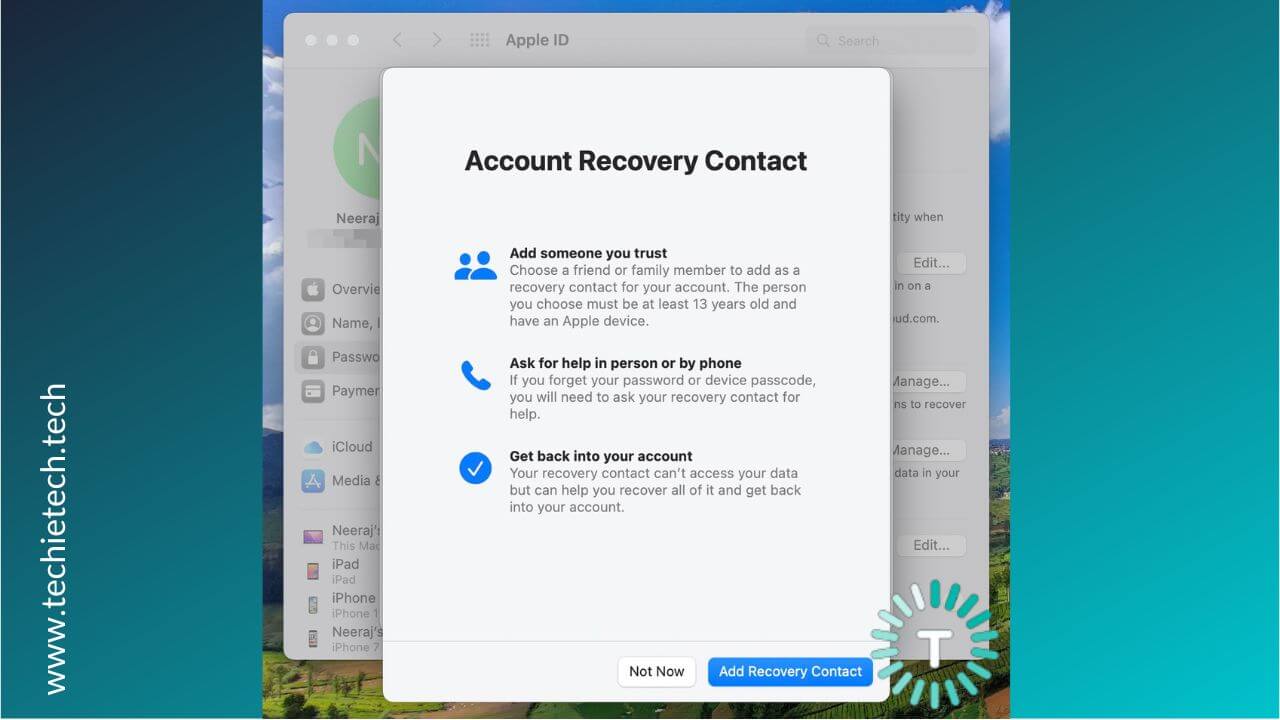
4. Tap Add Recovery Contact
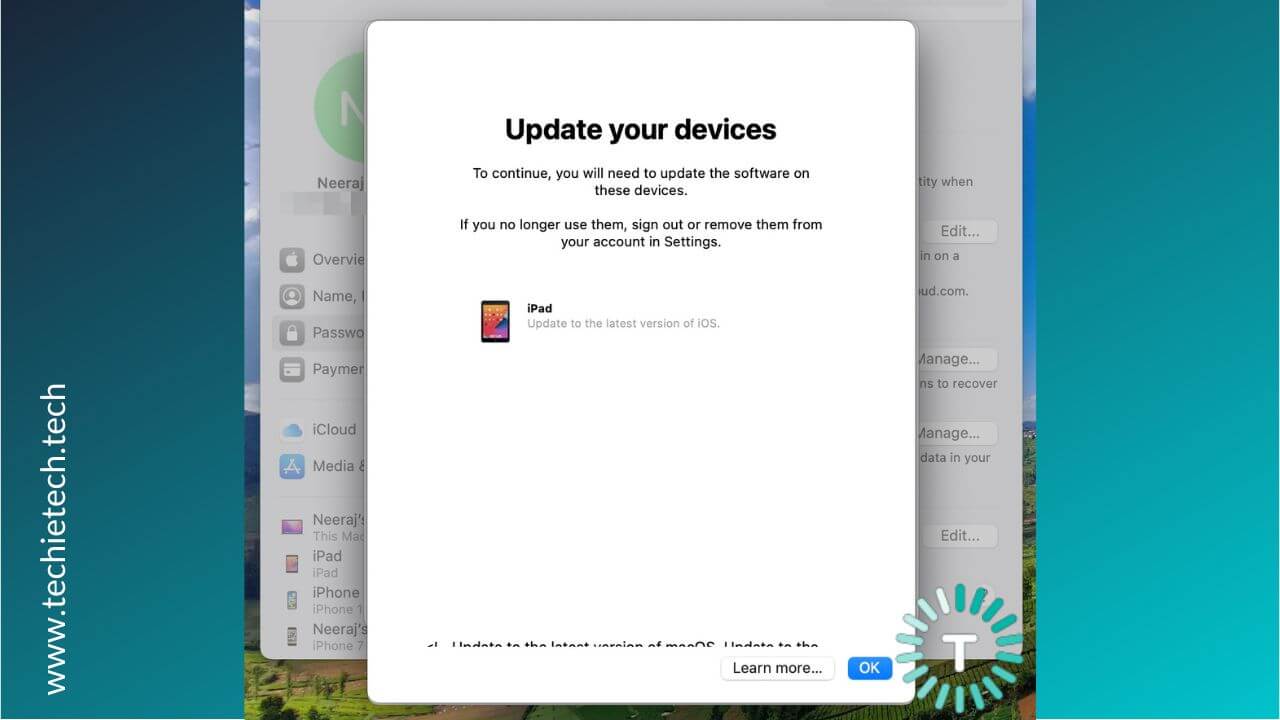
5. If any of your linked Apple devices is running a older version of OS, you’ll be asked to update or remove your devices.
6. Click Add button > Add Account Recovery Contact. 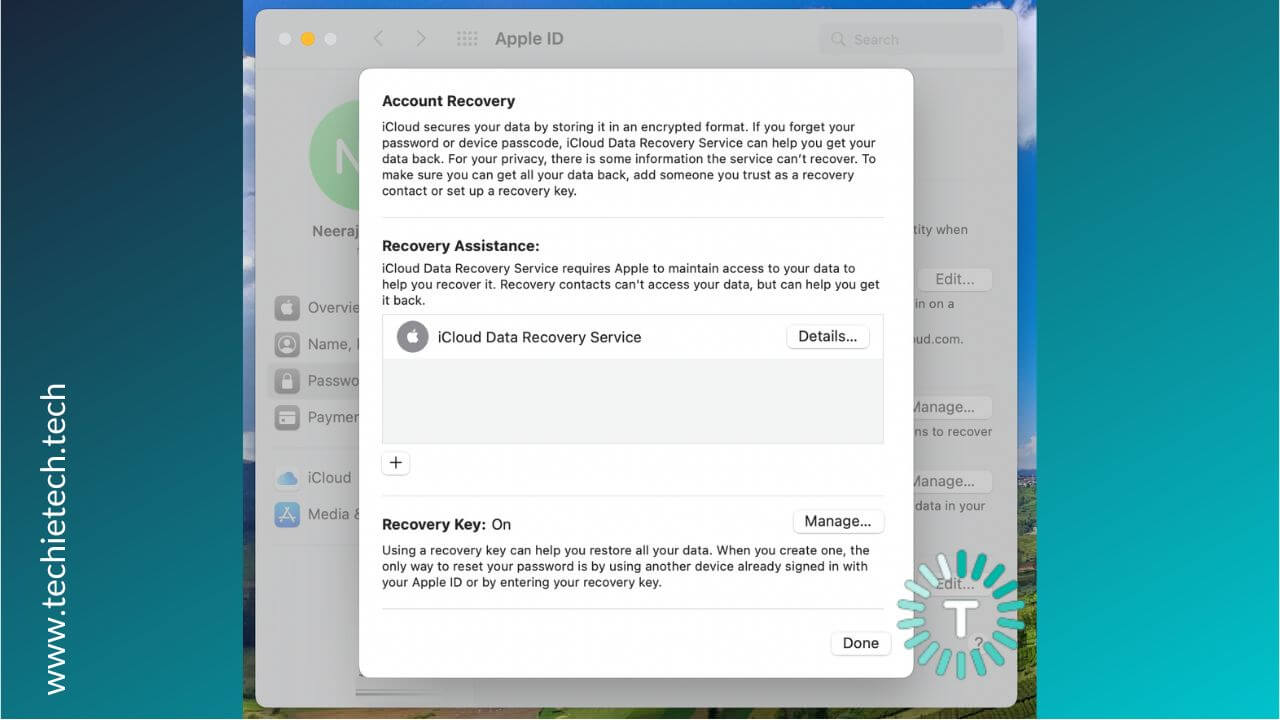
7. You then need to authenticate with your TouchID or Mac password.
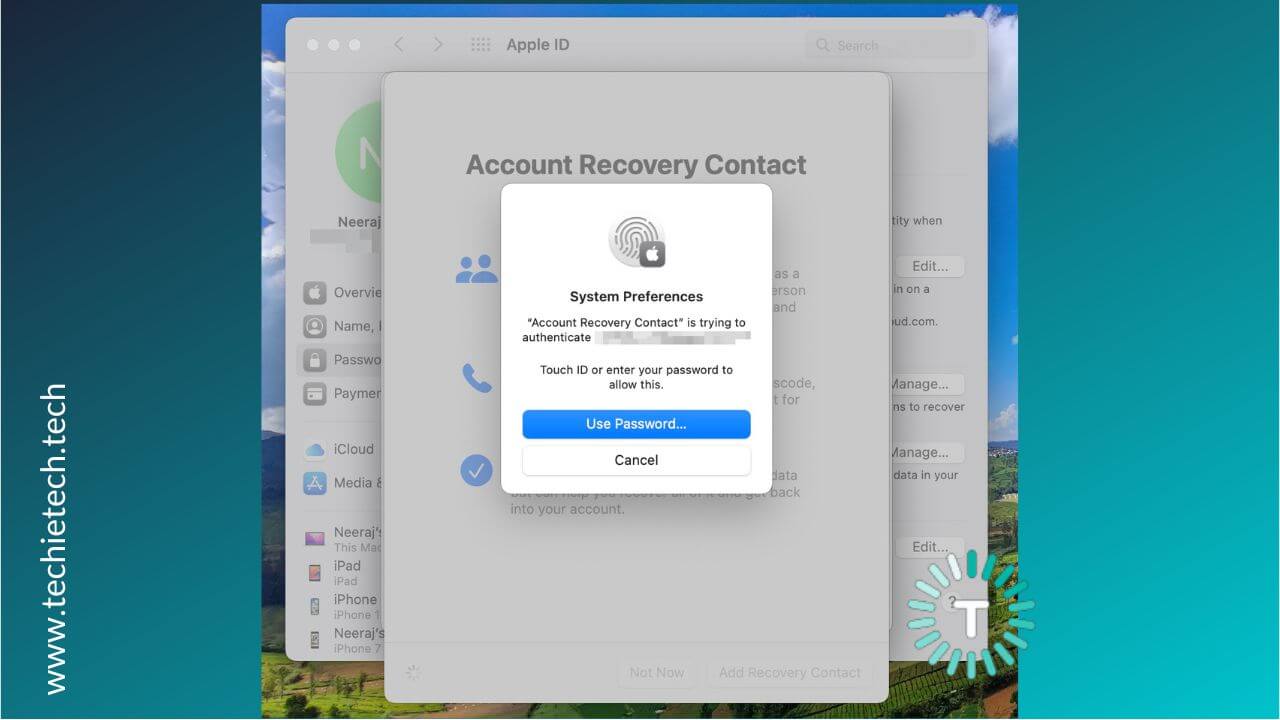
8. If you’re in a Family Sharing group, your Mac will recommend you add the members of the group as your recovery contact. If you want to choose a name from your contacts, select Choose Someone Else and click Continue.
9. Your family members will be added automatically. Whereas, if you select a contact, they must accept the request. You can call or message them to let them know that you want to add them as your recovery contact.
10. After the contact has accepted the request, you’ll see a message that they have been added as your iCloud account recovery contact.
Also Read: How to use iPhone as a webcam on Mac using Continuity Camera
How can you get the iCloud account recovery code from your recovery contact?
If you ever forget your Apple ID or can’t access your iCloud account, you’ll need the six-digit code from your recovery contact to reset your Apple ID password. You can ask your recovery contact to follow the below steps and give you the recovery code.
1. Open Settings > [Your Name]
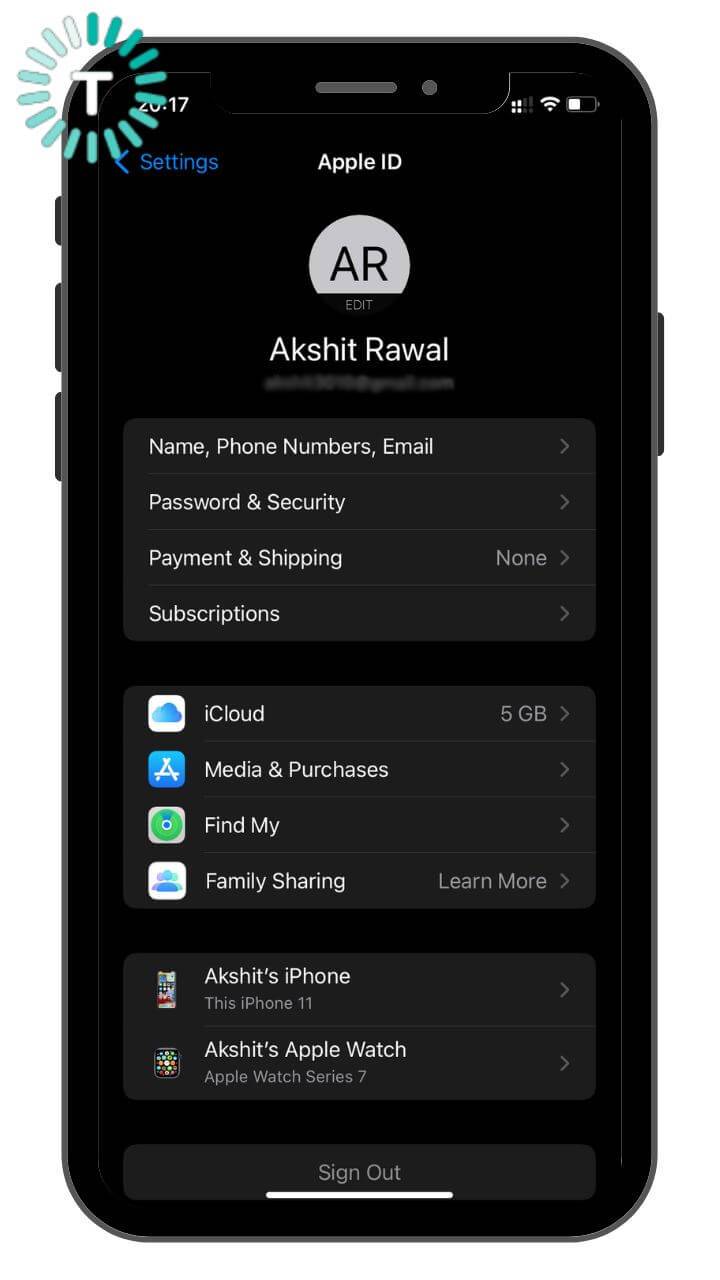
2. Hit Password Security > Account Recovery
3. Tap your phone number or email ID (used for Apple ID) under the Account Recovery For section.
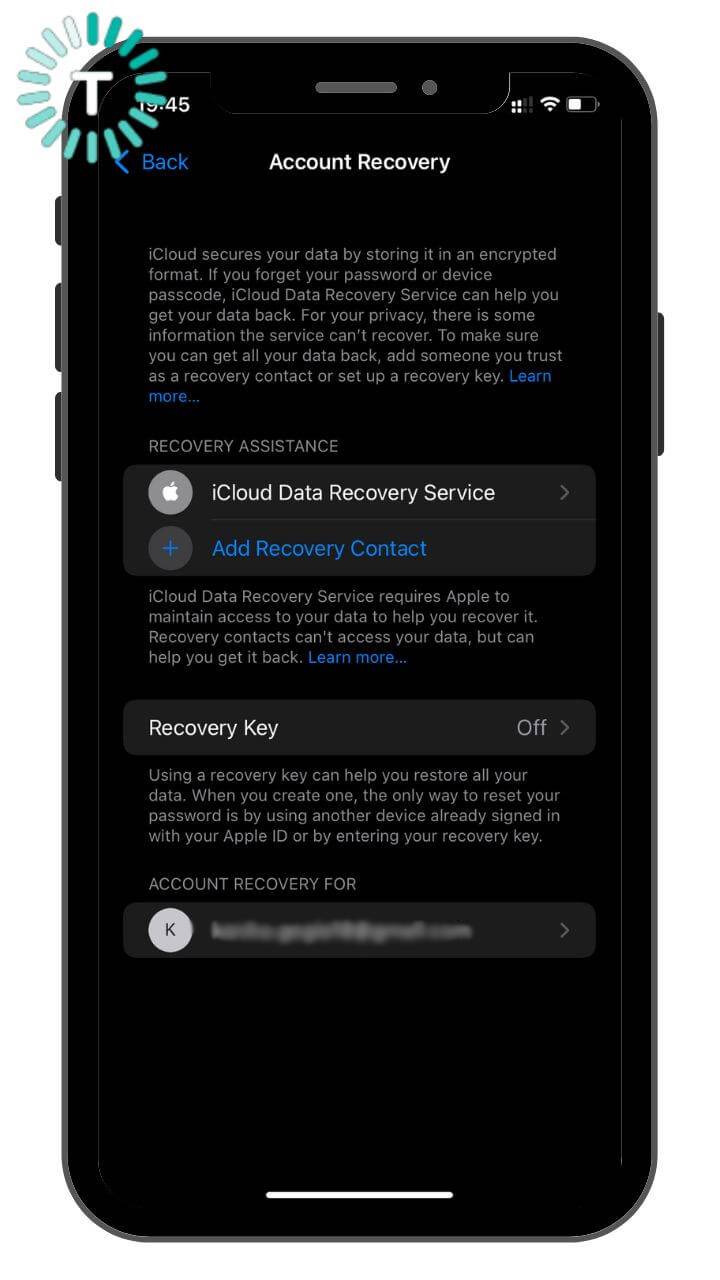
4. Tap Get Recovery Code.
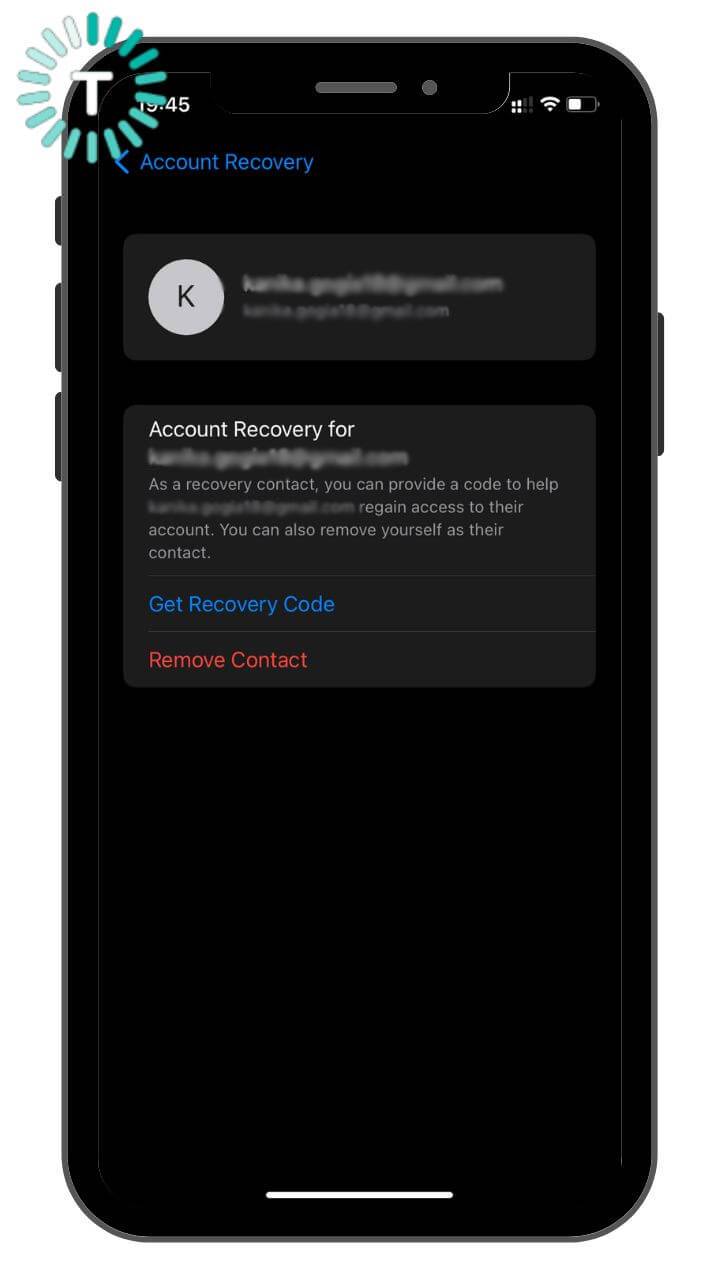
5. Ask your friend to share this code with you.
6. Once you’ve got this code, your identity will be confirmed. Then, you can reset your password and gain access to your iCloud Account.
How to accept the Apple recovery contact request?
There can be instances when your friend or a contact wants to add you as their recovery contact for the iCloud account. In such a case, you’ll need to accept the recovery contact request sent by your friend or contact. When they send you an invitation to add you as a recovery contact to recover their Apple ID password, you’ll get a notification in the Messages app on your Apple device. If you’re part of their Family Sharing group, you’re automatically added as their recovery contact. Otherwise, you’ll be prompted to accept or decline this request.
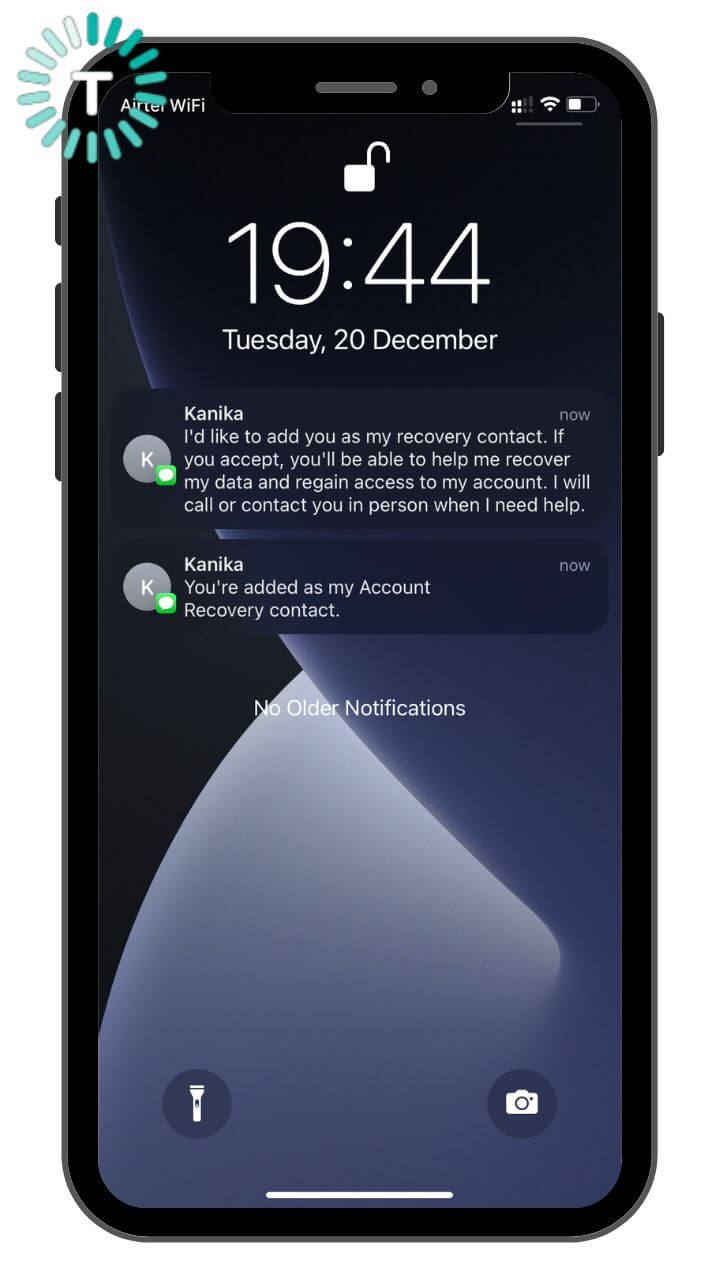
To accept the recovery contact request, open that notification in the Messages app and tap Accept.
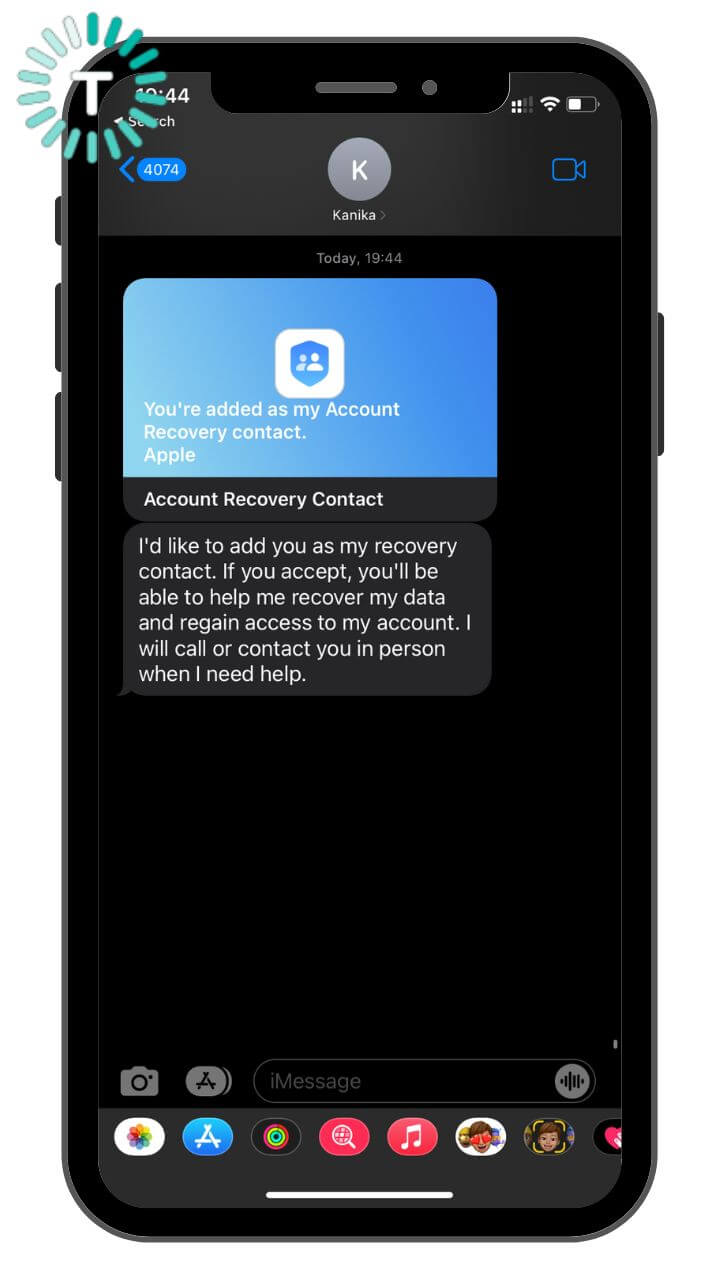
Once you do this, head to Settings > [Your Name] > Password & Security > Account Recovery.

You’ll see the details of the person under the Account Recovery For section. You can tap on the name to get the Recovery Code or Remove Contact.

Also Read: How to set eSIM on an iPhone (Step-by-Step Guide)
We hope you’ve successfully set up a recovery contact on your iPhone, iPad, and Mac. Did everything turn out smoothly or you came across any issues? Don’t forget to share your experiences in the comments below.

