Are you facing MacBook Pro keyboard issues? Is your MacBook Air keyboard not working properly? Do the Mac keys stop working at random or keys keep on repeating? Do you face MacBook keyboard sticking issues? Are you looking for ways to fix your MacBook keyboard? If the answer is yes, for any of the above questions or if you’re facing other types of keyboard issues on your Mac, you’ve landed at the right place to get them sorted.
Before we begin any further, we would like to tell you that it’s not only you, who’s facing such issues. A lot of MacBook users have reported keyboard issues with their Apple Butterfly keyboards. We are talking about the Mac models that were released between early 2015 and 2019. Apple has made improvements in the latest MacBook models that were launched in 2019 end or later. But, if you’re using an older MacBook, you’ll have to fix those keyboard problems.
Before we jump to the list of solutions, let’s understand why your MacBook has keyboard issues. Also, it’s worth mentioning, that there are some issues that cannot be fixed at your end. So, what should you do in such a case? Don’t worry, we’ll answer all your questions in this guide, so let’s begin.
What causes MacBook keyboard not working issues?
One of the most common reasons why your Mac keyboard is not working can be dust or debris that accumulates around and underneath the keys of your keyboard.
If you don’t clean your keyboard, the accumulated dust and other particles can stop the keys from registering. As a result, you’ll end up with keys that don’t press properly, keys that stick to the keyboard, keys skipping keystrokes or keys that keep on repeating on your MacBook Pro and MacBook Air’s keyboard.
Disclaimer: Proceed at your own risk, TechieTechTech will not be responsible if anything goes wrong with your device.
How can you fix MacBook Keyboard not working issues?
1. Update macOS
Updating macOS can help you fix keyboard-related issues on your MacBook. Software updates are released with security patches and updated firmware that can fix many issues, including keyboard not working problems on your MacBook.
- Head to System Preferences > Software Update or Click on the Apple Logo > About this Mac
- If any updates are available, click the update button to install them.
- If the Software Update says that your Mac is up to date, that means you’ve already installed the latest version of macOS and all of its apps are up to date.
If your device runs the latest macOS, move to the other steps mentioned below.
2. Clean your keyboard
If you notice dust around and underneath the keys of your Mac keyboard, you must clean it and check if it has solved the MacBook keys not working issues.
Follow the steps mentioned below to clean your MacBook Pro/Air keyboard:
- Turn off your Mac and unplug its adapter.
- Turn your laptop upside-down and give it a gentle shake to clear loose and larger chunks of debris or other unwanted particles.
- Now, hold your Mac at 75-degrees and spray compressed air in a left to right motion to clear all the debris that has lodged between the keys.
- You can now use a specialized cleaning brush to remove smaller particles.
3. If some keys don’t work (Caps lock, media eject, and other)
- Caps Lock
If the Caps key is not working with a quick tap on your wireless, USB, or Mac’s built-in keyboard, you must hold down the key and wait for a second or until the key’s green indicator lights up. Follow the same method to turn off the Caps lock.
- Media Eject key (Older MacBooks, not for Thunderbolt 3 ports)
It’s worth mentioning that the media eject key is designed with a slight delay to avoid accidental activation. If this key is not working on your keyboard, hold down the media eject key until you see the Media Eject icon on your screen.
- Other keys
It can be possible that you’ve set an option that changed the way your keyboard operates. Head to Apple menu > System Preferences > Accessibility pane and try the mentioned steps:
- Click Speech. If you’ve selected “Speak selected text when the key is pressed”, deselect it or click Change Key to select another key.
- Select the Keyboard. Make sure Enable Slow Keys is turned off. If it’s on, you’ll have to hold down a key longer than usual before it gets recognized.
- Click Mouse & Trackpad. Make sure Enable Mouse Keys is off. If it’s on, pressing keys in the numeric keypad moves the pointer instead of entering numbers.
- In the Keyboard pane, click Input Sources. Make sure that the correct keyboard layout is selected.
You must ensure that you’re using the correct keyboard layout by checking the current layout.
- In System Preferences > Keyboard, then select Show keyboard and emoji viewers in the menu bar.
- Select the keyboard icon > Show Keyboard Viewer. It will display a graphical representation of your keyboard highlighting the corresponding keys you press on your keyboard.
Also read: Best Ultrawide Monitors You Could buy for your MacBook Pro (M1 & M2)
4. Reset SMC
The System Management Controller (SMC) is a chip on your MacBook that’s responsible for running various physical parts of your device, including keyboard, trackpad, power button, cooling fans, and battery. Resetting the SMC has proven to be an effective fix for all hardware and power-related problems, including charging and overheating issues on MacBook. Therefore, you must give it a try, for sure.
Note: The steps to reset SMC are dependent upon the model of the MacBook that you’re using.
Reset SMC on MacBooks that have T2 Chip (MacBook Pro & MacBook Air released after 2018):
- Shut down your Mac.
- Press and hold the Power button for 10 seconds and then release it.
- Wait for a few seconds and turn ON your device.
If you still face keyboard issues, follow the steps mentioned below to reset the SMC:
- Shut down your device.
- On the built-in keyboard, press and hold Control + Option (Alt) +Shift keys. Your device might turn on.
- Continue to hold the three keys for 7 seconds. Now, press and hold the Power button simultaneously. If your Mac is ON, it will now turn off.
- Continue to hold the four keys for another 7 seconds.
- Release the keys and wait for a few seconds.
- Turn ON your Mac.
Click here for the steps to reset SMC on earlier models of MacBook Pro and MacBook Air.
It’s worth mentioning that resetting SMC can also help you fix MacBook Trackpad issues as well.
Once you’ve reset the SMC on your Mac, check if it has fixed mac keys not working issues.
Also read: Best Ultrawide Monitor for Productivity [Buying Guide]
If your MacBook Trackpad is not working
MacBook Trackpad is a great way to smoothly interact with the MacBook through finger gestures. It’s super-responsive and precise, just the way we all like it.
If your MacBook Trackpad is not working, you can follow the steps mentioned below to fix these issues.
1. Restart your MacBook
Here comes an old-school yet effective hack that works like magic in many cases- a simple turn OFF and ON. If your MacBook Trackpad is not working, you must try rebooting your device.
- Head to Apple Menu > Restart
- After your Mac has rebooted, close the lid, put your MacBook to sleep, and wait for around 3-4 minutes.
- Now, open the lid and check if your Trackpad is working.
2. Disable Force Click (only for Mac with 3D Touch)
The failure to register the click might cause the trackpad not to work on the MacBook. In such a case, you can try disabling the Force Click and check if it works for you.
- Head to System Preferences
- Select Trackpad and go to Point and Click Tab
- Disable the Force Click and haptic feedback option
3. Reset SMC
As we mentioned in the above section that SMC is responsible for running various physical parts of your device, including keyboard and trackpad, you can reset SMC to fix Mac trackpad not working issues as well.
We’ve mentioned all the steps in detail to reset SMC on your MacBook in the above section
Once you reset SMC, check if the MacBook trackpad problem has been fixed.
If both the MacBook Trackpad and Keyboard are not working
1. Delete .plist files
The Property List (PLIST) files are used to save the preferences of applications. The outdated files could become faulty and cause problems on your device. Deleting the PLIST files will reset your trackpad and keyboard back to the factory settings and help you fix those issues. You must back up your Mac with the Time Machine, before proceeding to the steps mentioned below.
1. Open Finder
2. Press Command + Shift + G
3. Type ~/Library/Preferences/ and press Go
4. Now, locate the following files
- com.apple.driver.AppleBluetoothMultitouch.trackpad.plist
- com.apple.driver.AppleHIDMouse.plist
- com.apple.driver.AppleBluetoothMultitouch.mouse.plist
- Com.apple.preference.trackpad.plist
- com.apple.AppleMultitouchTrackpad.plist
5. Delete these files
6. Restart your MacBook
2. Reset PRAM & NVRAM
NVRAM and PRAM are a small amount of memory that your MacBook uses to store and quickly access certain information. Resetting these memory modules is an effective way to fix a variety of problems related to display, sound volume, etc. on your MacBook. Please note the steps for resetting NVRAM and PRAM are the same.
Follow the steps mentioned below to reset PRAM/NVRAM on your MacBook Air/Pro:
- Shut down your Mac
- Now, while rebooting your device, press and hold Command + Option + P + R. before the grey screen appears.
- When you hear the reboot sound or see the Apple logo, release the keys, and allow your device to turn ON by itself.
3. Restore your MacBook to a previous version of macOS
If you recently started facing MacBook keyboard and trackpad problems, then it might be due to a recent system change. To fix these issues, you can restore your MacBook to an earlier version. This method will require the Time Machine to back up your Mac data.
Note: Restoring will erase any changes that you’ve made to the files on your Mac since you installed a new version of macOS on your device. If you want to save those new or revised files, make sure to copy them to a different disk, before proceeding to the steps mentioned below.
- Head to Apple Menu > Restart.
- After your Mac restarts, press and hold the Command + R keys.
- When you see the Apple logo, release the keys.
- Choose Restore from a Time Machine Backup, then click Continue.
- Now, choose your Time Machine backup disk.
- Choose the Time Machine backup you want to restore. If you want to restore your Mac to the state it was in before you installed the new version of macOS, choose the most recent backup that occurred before you installed the new version.
- Follow the onscreen instructions.
Don’t miss: Best Docking Station for 14 and 16-inch MacBook Pro
How to fix the Double Press Keyboard issue on Mac?
Here’s a software fix for the double press keyboard problem on MacBook Pro and MacBook Air.
Unshaky is a Mac utility that addresses the MacBook keyboard issues by dismissing the ‘second key hits’ that are caused due to the keyboard fault. This app has helped a lot of users to fix the double press keyboard problem on their Mac. Here are the steps to fix such issues with Unshaky:
- Download the Unshaky app. When you open the app, follow the on-screen instructions. If it doesn’t work, head to System Preferences > Security and Privacy > Privacy Tab > Accessibility > add Unshaky app. Make sure it’s checked.
- Now, click the Unshaky icon and open the Menu bar. Select “configure” to configure delays for defective keys.
- Unshaky registers each keypress and dismisses any repeated key hits after 40 milliseconds.
- You can configure the delay according to your typing speed. It’s recommended that you first start with 40ms. If it doesn’t fix the problem, then gradually increase it to 60ms or 80ms.
Also read: 13 ways to fix MacBook not charging issues
If you’ve already tried everything that we’ve mentioned above and nothing has worked for you, don’t panic because you’re not alone. Many users have reported MacBook keyboard not working issues, and unfortunately, you cannot fix those issues at your end.
What is the actual problem with the MacBook keyboards?
We know that Apple has been using the Butterfly keyboard mechanism since 2015, and it follows a different approach as compared to Scissors switch keyboards. Basically, the Butterfly keyboard mechanism was adopted to achieve a flat keyboard and ultimately a slim look for the MacBooks. This was made possible because of the fact that each key needs less travel when pressed, therefore less space is needed. Although the Butterfly keyboard mechanism has helped make MacBooks slimmer, they can get accumulated with dust and debris resulting in Mac keys not working, keys repeating, keys not pressing properly, or keys sticking issues to the bottom of the keyboard. It’s worth mentioning that if a particular key is not working on your MacBook’s Butterfly keyboard, then it’s not possible to remove that single key, clean the dust, and fix the keyboard issues. In such cases, the entire keyboard has to be replaced.
Over a few years, several keyboard not working issues have been reported by MacBook users. The list also includes Spacebar not working, keyboard not working except power button, and many other similar problems on MacBook Air and MacBook Pro.
Lawsuits and Petitions
Three action class lawsuits were filed against Apple over the Mac keyboard issues. The first lawsuit was filed in May 2018 by two users when their MacBook Pro keyboards stopped working. After that, two more lawsuits were filed for similar keyboard issues, including Spacebar sticking or Space bar not working issues.
Later on, a petition was also filed against Apple, which has been now signed by around 41,660 users (as of August 2020). Update: Over 86,000 people have filed (as of May 2023).
This petition suggested that Apple should recall every MacBook Pro model that was released since late 2016 and replace the defective keyboard with a new, working keyboard.
At the end of June 2018, Apple admitted that there were keyboard problems with certain MacBook, MacBook Pro, and MacBook Air models. To make up for the inconvenience, Apple offered free repairs to the Mac models that were affected by the keyboard issues. Later on, Apple also introduced Mac models with improvements in the Butterfly keyboard mechanisms.
Also read: 14 ways to fix MacBook Pro overheating issues
Apple’s answer to the keyboard problem
Update May 2023: Apple’s $50 million butterfly keyboard settlement has finally got green light.
The settlement will compensate 86,000 people who filed claims for repairs they’d paid for due to the faulty keyboard design.
Apple Keyboard Service Program for MacBook, MacBook Air, and MacBook Pro (introduced in mid-2018)
In June 2018, Apple introduced a Keyboard Service Program for certain MacBook, MacBook Pro, and MacBook Air models that were equipped with Butterfly keyboards and showed one or more of the following behavior:
- Keys (letters or characters) repeat unexpectedly.
- Letters or characters do not appear.
- Keys feel sticky or do not respond in a consistent manner.
Apple or an Apple Authorized Service Provider will service the eligible MacBooks free of charge. Firstly, the keyboard will be examined and then the type of service is determined. It may involve the replacement of one or more keys or even the entire keyboard.
Which MacBook models are eligible for the Apple Keyboard Service Program?
The MacBook models that are eligible for the Apple Keyboard Service Program have been listed below:
- MacBook (Retina, 12-inch, Early 2015)
- MacBook (Retina, 12-inch, Early 2016)
- MacBook (Retina, 12-inch, 2017)
- MacBook Air (Retina, 13-inch, 2018)
- MacBook Air (Retina, 13-inch, 2019)
- MacBook Pro (13-inch, 2016, Two Thunderbolt 3 Ports)
- MacBook Pro (13-inch, 2017, Two Thunderbolt 3 Ports)
- MacBook Pro (13-inch, 2019, Two Thunderbolt 3 ports)
- MacBook Pro (13-inch, 2016, Four Thunderbolt 3 Ports)
- MacBook Pro (13-inch, 2017, Four Thunderbolt 3 Ports)
- MacBook Pro (15-inch, 2016)
- MacBook Pro (15-inch, 2017)
- MacBook Pro (13-inch, 2018, Four Thunderbolt 3 Ports)
- MacBook Pro (15-inch, 2018)
- MacBook Pro (13-inch, 2019, Four Thunderbolt 3 Ports)
- MacBook Pro (15-inch, 2019)
Apple has clearly stated that no other Mac models are a part of its Keyboard Repair Program.

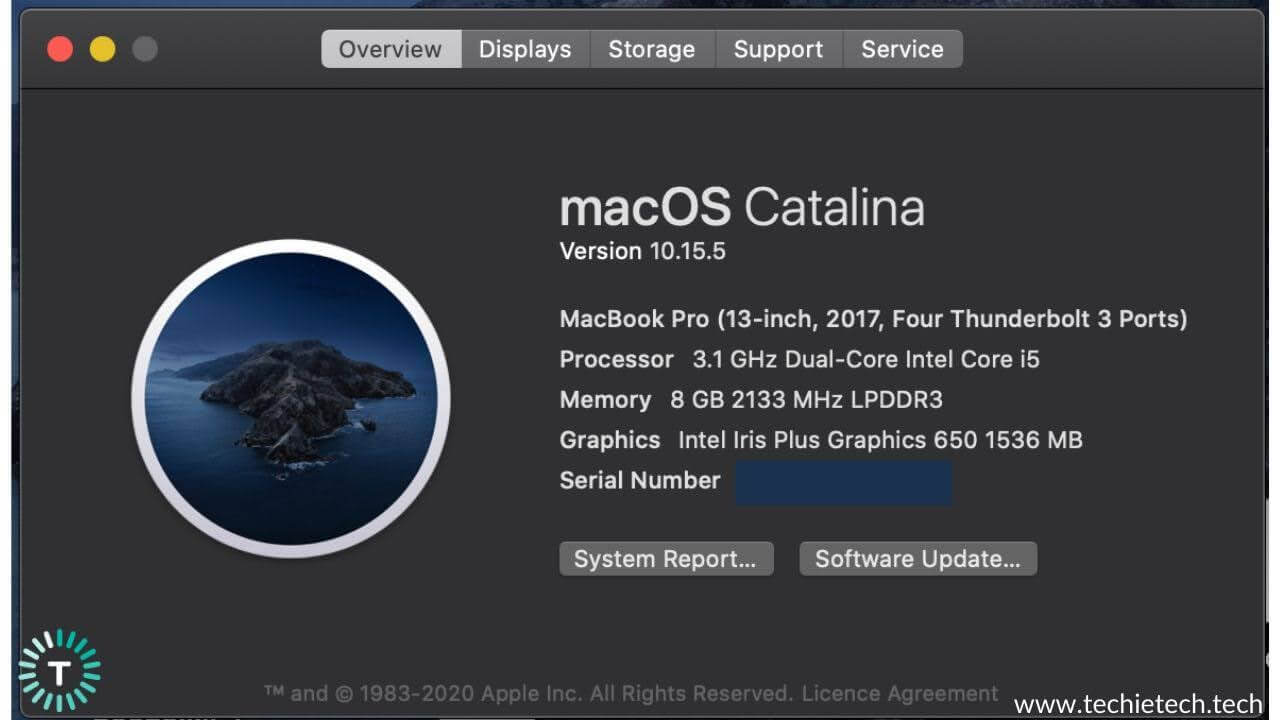
To check if your MacBook model is eligible for the keyboard service program, head to Apple Menu > About this Mac. You’ll see the model of your Mac.
Also read: Best HDMI adapters for MacBook Air & MacBook Pro
How to get your eligible MacBook’s keyboard serviced?
If you own a MacBook from the eligible models that have been listed above, you can go for Apple’s Keyboard Service Program. It’s worth mentioning a few important points here:
- The eligible Mac models are covered for 4 years after the first retail sale of the unit. For example, the MacBook (Retina, 12-inch, Early 2015) is no longer covered for the free repair or service.
- Apple will examine your Mac to verify that your device is eligible for the program.
- After examination, the type of service is determined. It may involve the replacement of one or more keys or the entire keyboard.
- The service turn-around time depends upon service type and availability of replacement parts.
- If there are some other issues on your MacBook, MacBook Pro, or MacBook Air that impairs the service, Apple will first repair those issues and may charge you for that.
You can follow one of the following three options for service:
- Find an Apple Authorized Service Provider.
- Make an appointment at the Apple Retail Store.
- Mail-in your MacBook details at the Apple Repair Center.
Also, make sure that you backup your MacBook data before sending your device for the repair or service.
Also read: How to fix MacBook Pro battery drain issues
Improvements in the Butterfly keyboard mechanism
After Apple launched the Keyboard Service Program, the company had been making consistent efforts to fix the Mac keyboard issues. In July 2018, Apple launched a 13-inch MacBook Pro with an updated third-generation Butterfly keyboard. The updated keyboard has a thin silicone barrier under each key, which was introduced to prevent dust and debris from getting into the keys. However, these measures were not enough to cut down on keyboard issues and the users had reported that the 2018 MacBook Pro still had keyboard not working problems.
After that, Apple introduced MacBook Air models in October 2018, with an aim to remove keyboard problems that were reported in the earlier models. But, this time too, complaints were reported on forums and websites stating that these MacBook models also had similar keyboard issues.
In 2019, Apple launched MacBook Pro models with additional improvements in the third-generation of Butterfly keyboards. According to an iFixit teardown, Apple had made changes to the membrane that covers the keyboard switches. Also, several changes were made to the metal dome to address bounce-back, durability, and other issues. Later on, the 2018 MacBook Pro and MacBook Air models that suffered keyboard failures were upgraded with the updated third-generation butterfly keyboard mechanism. However, even these latest butterfly keyboards weren’t error-free.
Therefore, in May 2019, the Keyboard Service Program was expanded to include all the MacBook models that were equipped with the Butterfly keyboard mechanism, including the 2018 and 2019 models.
Also read: Best Ethernet adapters for MacBook Pro and MacBook Air
Apple switched to Scissor-switch mechanism

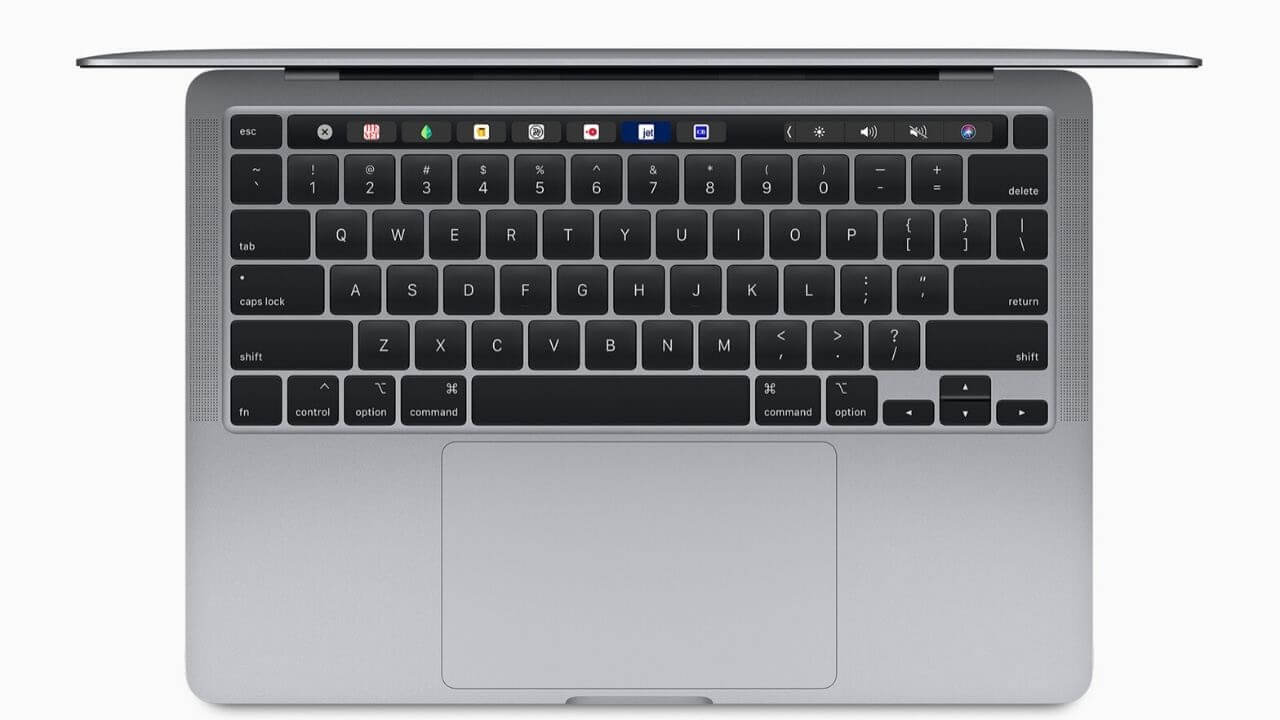
Apple had been using the butterfly Keyboard ever since 2015, but now the company has swapped it out completely with the scissor-switch mechanism. It started with the 2019 MacBook Pro 16-inch, then with the MacBook Air released in March 2020, and finally with the 13-inch MacBook Pro 2020. As of now, Apple doesn’t sell any new laptop with the butterfly keyboard mechanism. The new and durable scissor-switch mechanism keyboards are called Magic keyboards by Apple. The scissor-switch mechanism keyboards are faster and more stable, thanks to the 1mm key travel.
The layout features an inverted T arrangement for the arrow keys that makes them easier to find, while you’re working on spreadsheets or playing games on your Mac. There’s a Touch Bar, Touch ID, and a physical Escape key as well. Also, Magic keyboards are designed to offer a comfortable and quiet typing experience.
Also read: Best USB-C adapters for Mac
With this, we’ve come to the end of our guide on how to fix your MacBook keyboard. We hope this gives you a better understanding of the MacBook keyboard issues and helps you fix them effectively.
Also, don’t miss our roundup for the best wireless mouse for MacBook Pro and MacBook Air.


